How to Remove
a Mustang T5 Transmission
Posted by: Clemens9
Since lots of people are
always asking how to drop a transmission, I took lots of pics
last time I did it so I could make a write-up.

First step- Get the car as high off the ground as possible. Make
sure you get all 4 wheels off, and leave plenty of room in the
front to pull the tranny out of and to sit under comfortably.
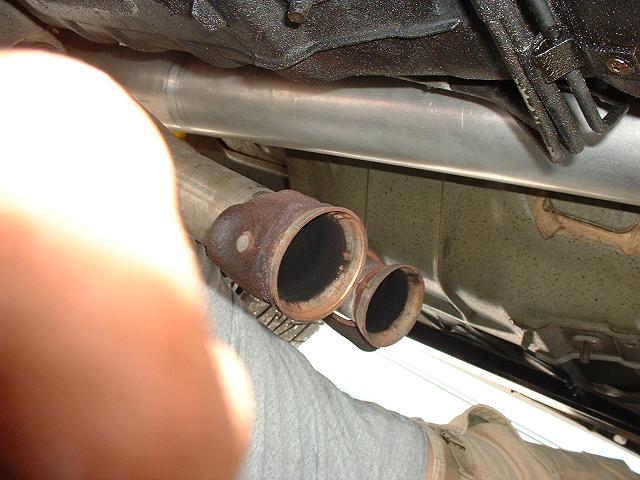
Second step- Remove exhaust. Its easiest if you pull the O-2
sensors off first, they sometimes get in the way. Then, make sure
you have a can of PB-blaster to remove the rust off the header
bolts, they can be a pain in the ass and add hours to the time if
you cant get them off. Spray lots on there, and let it sit for
about 5 minutes, and then take the nuts off of the header studs.
After that, remove the other side of the H or Y pipe from your
cat-back system.
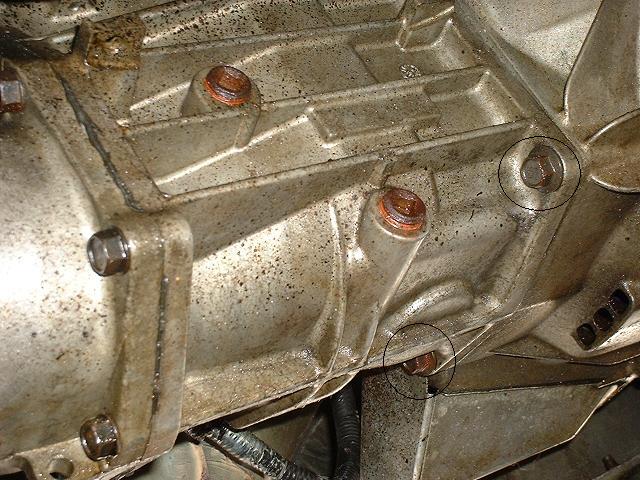
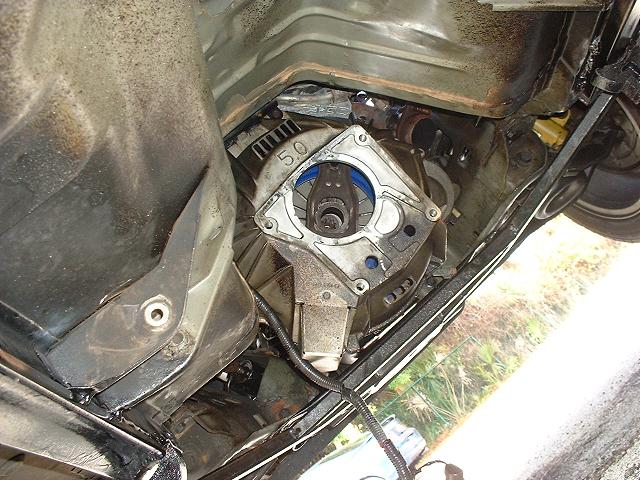
Third step- drain the fluid from the transmission. This is
important because if you remove the driveshaft with the fluid
still in the transmission, the fluid will come out the tailshaft
and get everywhere. Use the bottom drain plug in the picture (not
the circled bolt, but the red drain plug to the left of it).
edit- Remove the Shifter handle and bezel. You must go in the
car, unscrew the shifter top, take the bezel off, and then unbolt
the handle from the base of the shifter. When you are done, the
base of the shifter should look like this.
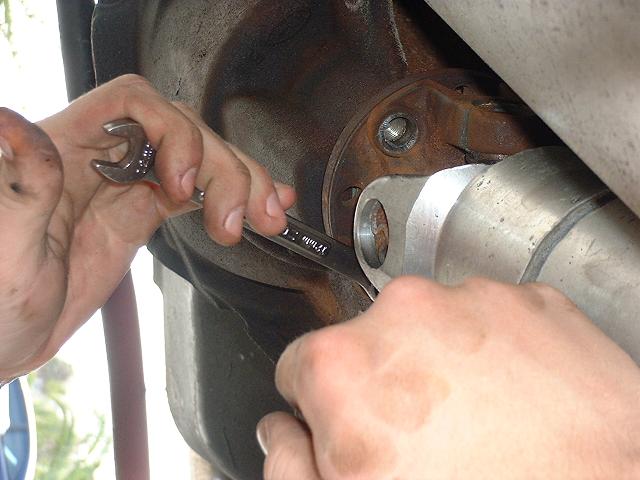
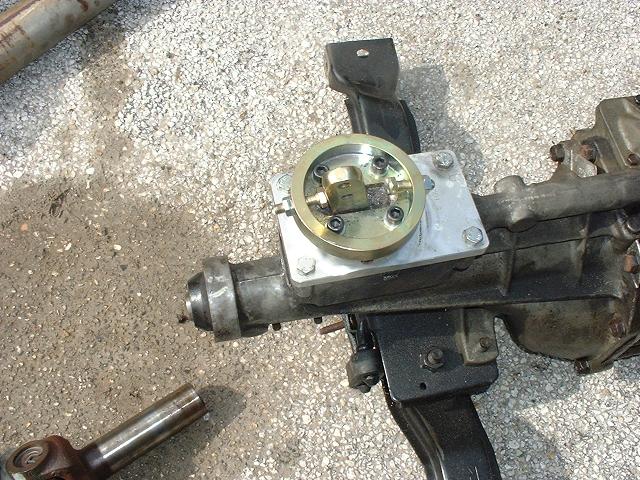
Fourth Step- Remove the driveshaft. For some people, this is the
hardest part. You need to make sure the rear end is high enough
to get a wrench and a breaker bar under there. Put the e-brake
on, and then remove each bolt one at a time. When you finish the
two bolts you can get off, take the e-brake off, rotate the
wheels by hand, and then set tbe brake again and take off the
rest of the bolts. You need a 12-pt 12mm wrench I believe (might
be 13mm). Some people can get it off with a ratchet head, but i
can never fit them in there because of the tight clearenced. You
will need some type of breaker bar also because those bolts are
on REALLY tight. Make sure you mark the driveshaft alignment. Put
a mark where the driveshaft was attached to the rear end so you
can put it back in the same place.
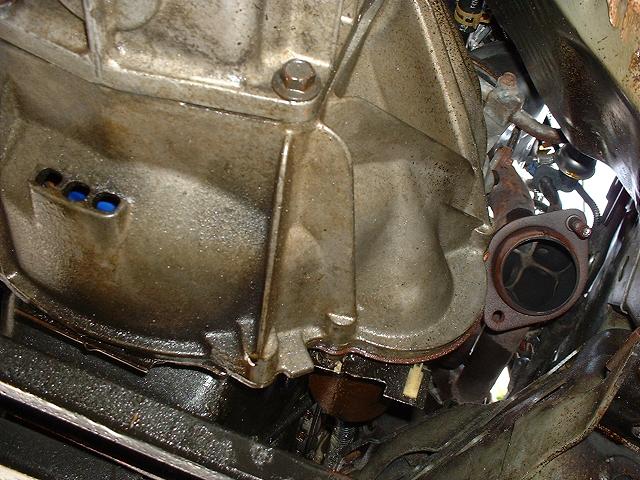
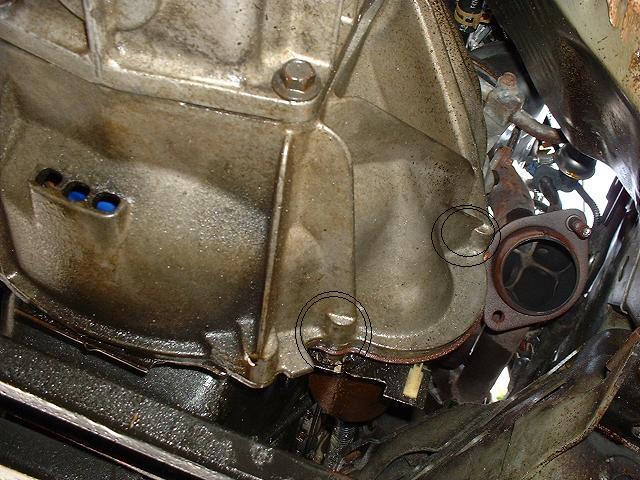
Fifth step- Removing the transmission to bellhousing bolts. This
is relatively easy. You just have to remove the 4 bolts that keep
the tranny attached to the bellhousing. Two of them are the
circled bolts in this picture, and the other two are above them.
You will need some extensions, and maybe a universal joint to get
the top ones off. Once these are off, only the input shaft and
the crossmember are holding the transmission in place. Also
remember to remove the 2 or 3 electrical connections that are
attached to the transmission.
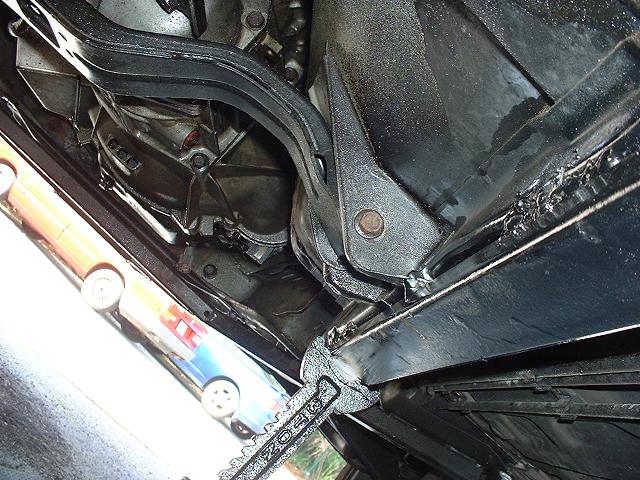
Sixth step- First, place a jack under the transmission, so it
doesn't start to fall. Next, start removing the crossmember bolts.
These are either 2 or 4 bolts that keep the transmission mounted
to the body of the car. Once these are removed, only the input
shaft is keeping it in place.
Seventh Step- Removing the transmission. You can either slowly
lower the jack while pulling it back out of the bellhousing, or,
if you are a bigger guy, lift the tranny up, remove the jack, and
pull it out and onto your chest. It weighs about 80-90 lbs, so
make sure your ready for it when it drops. Once its out, simply
place it on the ground and pull it from under the car.
Eighth Step- Remove the starter. First, unhook the battery, so
you don't electrocute yourself. Next remove the starter by taking
out the two bolts that attach the starter to the bellhousing.
They are located on the other side of this picture, where the
circles are. You will need a deep socket or a wrench to get them
off. You can leave the starter hanging in place, it just has to
be unbolted from the bellhousing.
Ninth Step- Remove the bellhousing. This is straight forward.
This is a bad picture, but I don't have anymore of it. Remove the
clutch cable from the clutch fork first, and then remove the C-clip
that holds the cavle to the bellhousing so you can completely
remove it. Then, just remove the 6 or 8 bolts that hold the
bellhousing to the block. There might be one or two smaller ones
that attach the bellhousing to the thing metal plate, so remove
them also.
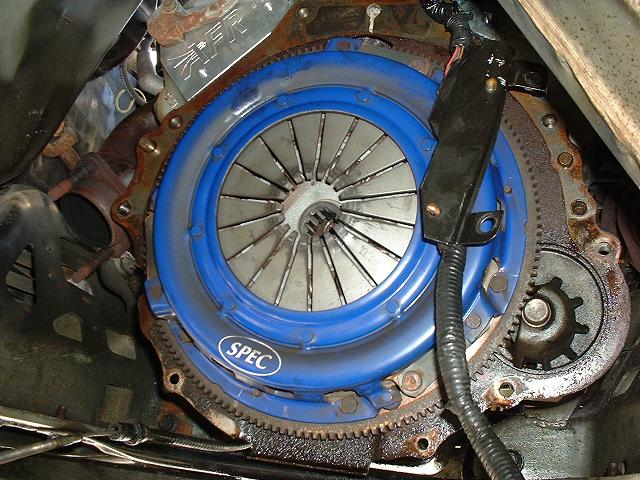
Tenth Step- Remove the clutch and pressure plate. This is also
straight forward. Just remove the 6-8 bolts that hold the
pressure plate and clutch disk onto the flywheel. Be ready when
you take it off, there are pins holding it in place, but its
surprisingly heavy when you pull it off. Make sure you mark where
you removed it from on the flywheel for balancing if you are re-using
the same clutch and pressure plate.
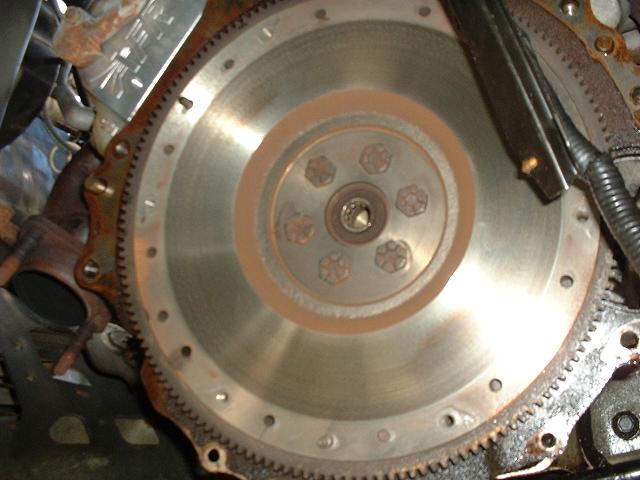
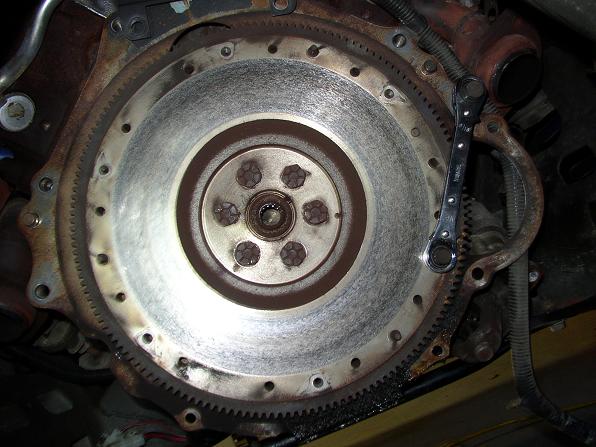
Last step- Remove the flywheel if necessary. If you are putting
in a new clutch, remove the flywheel so you can have it
resurfaced. You will notice something when you try to take them
off, the engine will turn. You will have to have someone hold the
crank bolt so the engine doesn't turn while you remove the bolts.
If you don't have another person available, either attach a C-clamp
to the flywheel teeth to keep it from moving, or set up something
else. This thing is heavy, so watch it when you remove it. The
flywheel will only go back on one way, so you don't have to mark
it.
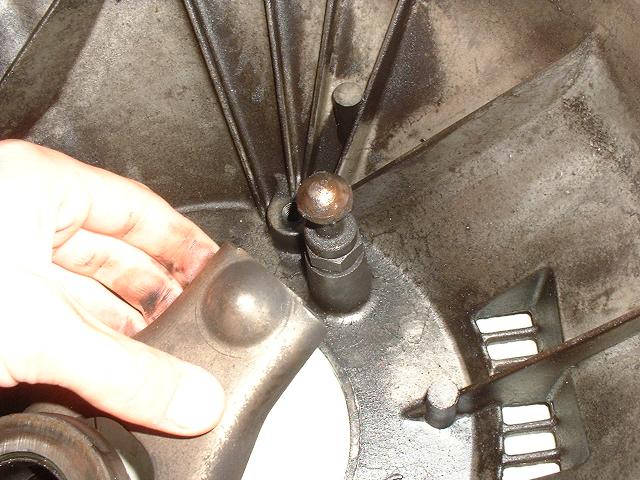
This is the pic that has
everything put together. The clutch fork is mounted correctly on
the bellhousing, and the TO bearing is on the fork.
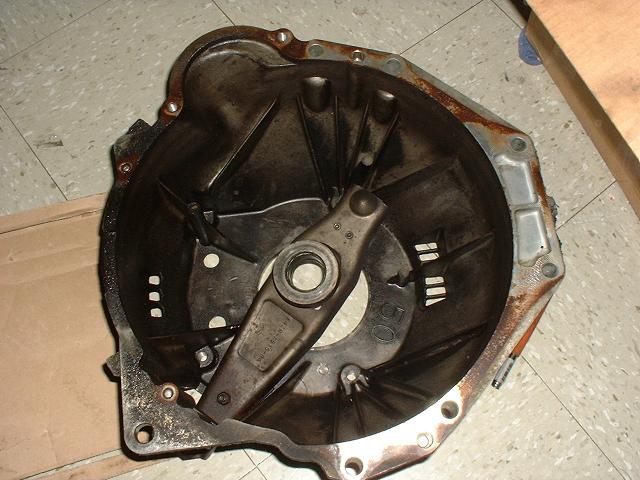
This is the clutch fork separated from the bellhousing. There are
two prongs on the fork that hold it onto the ball.
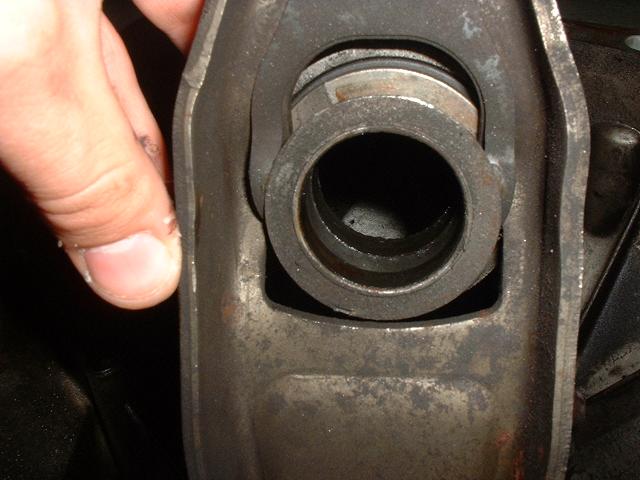
This is the TO bearing mounted correctly on the clutch fork. The
input shaft goes though the hole, and the TO bearing sits on the
pressure plate. It should sit on those prongs if its on
correctly, allowing it to pivot.
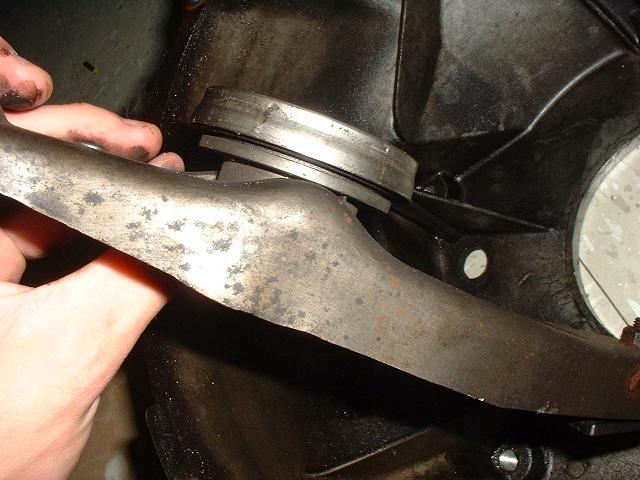
This is the back side of the fork, showing the other side of the
TO bearing.
Posted by:
ttbit
If you would like to add this
pic, it is a little trick on removing those flywheel bolts.
Someone suggested it on this forum, and it worked great for me!
Just look for the cheapo wrench. Not
the greatest pic, but you get the idea. You just have to switch
sides when you have to re-torque the bolts!